Kamis, 09 Desember 2010

12 Days of Christmas Cookies- Day 3: Cocoa-Nutmeg Snickerdoodles

This holiday season, we can give ourselves the gift of being healthy, and reaching our weight loss goals, while still enjoying our holiday baking! We can have our Christmas cookies, AND look good for Santa ;) For the 12 Days of Christmas Cookies, I will make healthy cookies, during each of the 12 days of Christmas!

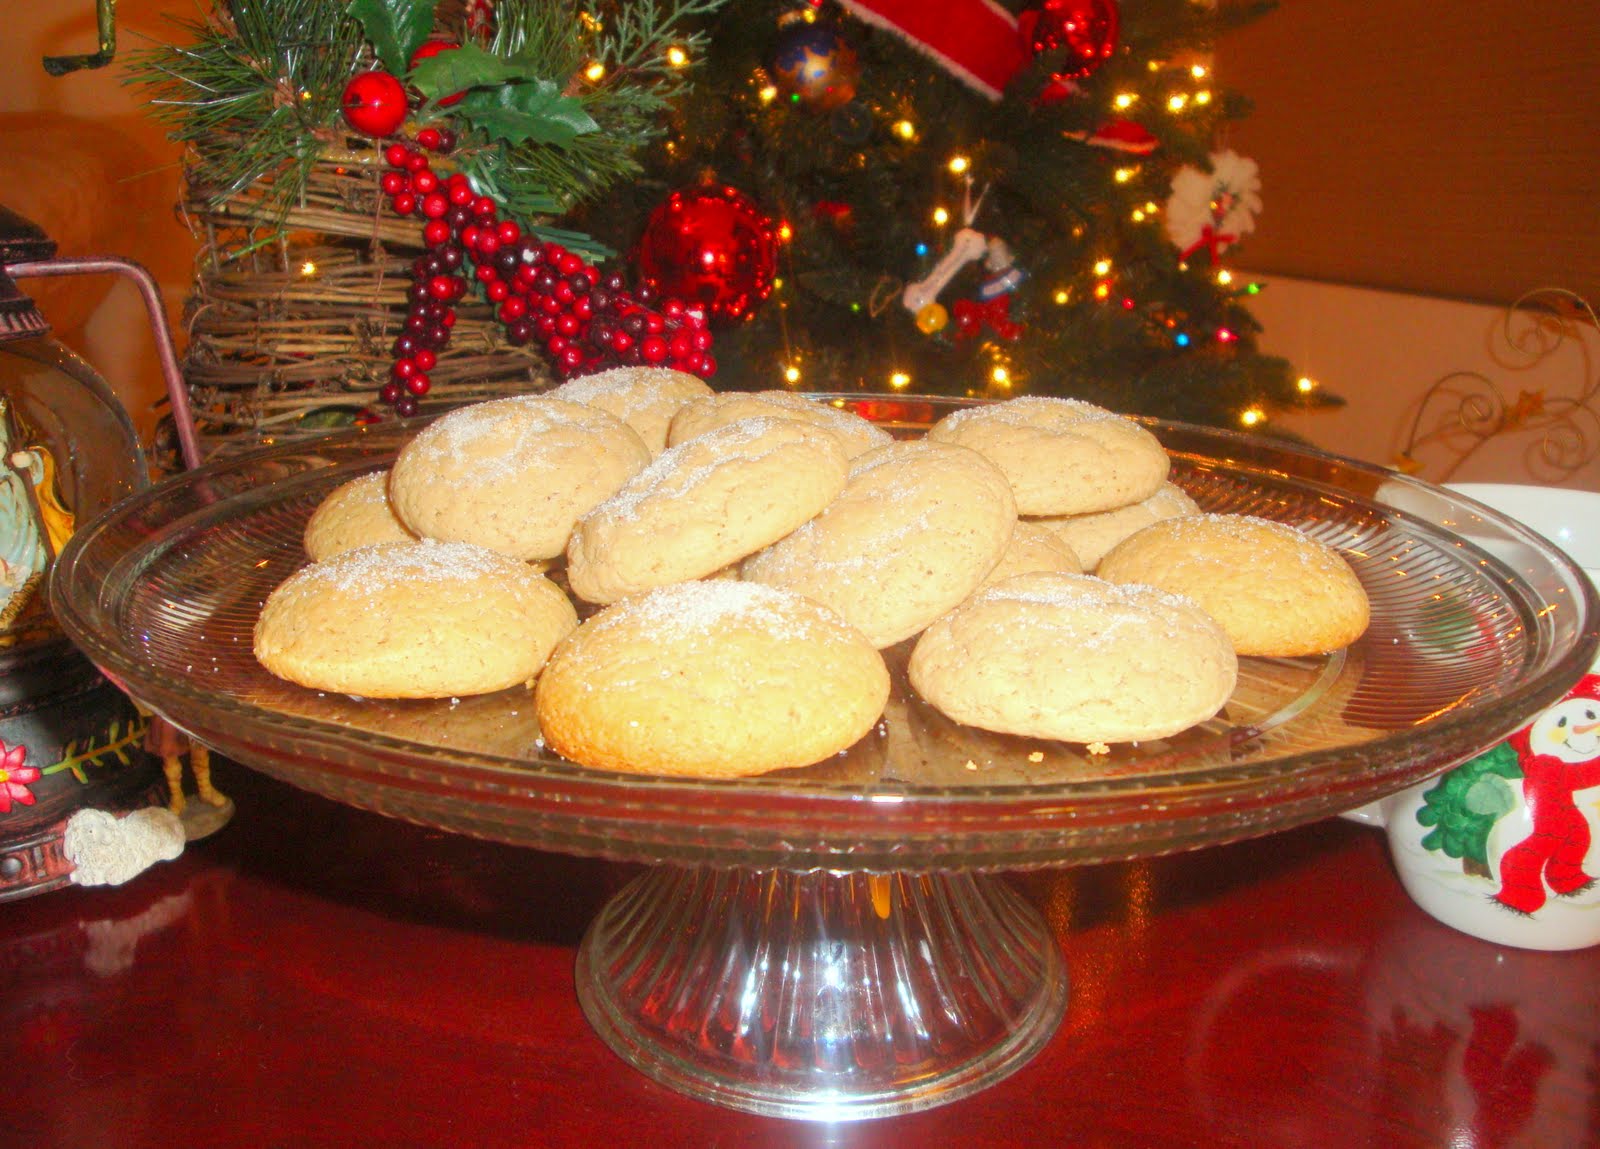
On the 3rd day of Christmas cookies, your true love made for you, Cocoa-Nutmeg Snickerdoodles.

Tonight, I fell in love.
Yes, I've fallen in-love with a cookie.I want you to imagine a sugar cookie, with a hint of cocoa and nutmeg.
Got it? Now you can see why I've fallen in-love, right?And for only 49 calories, this is a healthy relationship.
Which is good, because I've had my fair share of bad relationships with cookies.
Yes, I'm talking to Oreo's.

Get the recipe HERE.

My little elf.
Psst... I'm VERY excited about tomorrow, the 4th day of Christmas cookies!

On the 3rd day of Christmas cookies, your true love made for you, Cocoa-Nutmeg Snickerdoodles, Almond Meringue Kisses,
and Swirled Mint Cookies.

Rabu, 08 Desember 2010

12 Days of Christmas Cookies-Day 2: Almond Meringue Kisses

This holiday season, we can give ourselves the gift of being healthy, and reaching our weight loss goals, while still enjoying our holiday baking! We can have our Christmas cookies, AND look good for Santa ;) For the 12 Days of Christmas Cookies, I will make healthy cookies, during each of the 12 days of Christmas!

On the 2nd day of Christmas, your true love made for you, Almond Meringue Kisses.

I was both eager, and nervous to make these, for the 2nd day of Christmas cookies. I had never made meringue before, and it was one of those things that just seemed way out of my league. I swear my heart was racing the entire time. But I survived, and ended up with melt in your mouth goodness.


Before you start anything, you have to let 2 egg whites sit for 30 minutes, while they get to room temperature. Then you add the almond extract (which smells divine), cream of tarter, salt, and beat with an electric mixer, until soft peaks form.
Then you slowly add sugar and cornstarch, while beating on high. You do this until stiff peaks form. These were my stiff peaks. I've heard that if you beat meringue too much, it will lose it's volume, and it goes back to being flat. I was scared of doing that. Like horrified. I whipped my mixture on medium high, instead of on high like I was supposed to. For some reason I was scared to go all the way to high. I mixed it for about 2-3 minutes. That was when I started getting nervous that I had been doing it for too long, so I stopped. I definitely don't think it ended up as stiff as it was supposed to, because the kisses didn't hold up their shape perfectly. But hey, I'm not looking for perfection with my first time making meringue. The point is, they turned out, and they were delish!

Once the meringue is done, transfer it in
to a disposable piping bag fitted with a large closed star tip. Then pipe 1 inch "kisses" onto baking sheets, lined with parchment paper. Bake, and viola! Almond Meringue Kisses!
All in all, these were very easy to make.
They remind me of little snowballs, and they just melt right in your mouth. Mmm.
and for only 13 calories, you can't go wrong.
Get the recipe HERE.

I think they'd be perfect to bring to a holiday party.
Cause they're adorable, and delish.

On the 2nd day of Christmas, your true love made for you, Almond Meringue Kisses,
and Swirled Mint Cookies.

Selasa, 07 Desember 2010

12 Days of Christmas Cookies- Day 1: Swirled Mint Cookies

This holiday season, we can give ourselves the gift of being healthy, and reaching our weight loss goals, while still enjoying our holiday baking! We can have our Christmas cookies, AND look good for Santa ;) For the 12 Days of Christmas Cookies, I will make healthy cookies, during each of the 12 days of Christmas!

On the first day of Christmas, your true love made for you, Swirled Mint Christmas Cookies.


I was so excited to make these cookies, because of their colorful Christmas colors.
And I got to play with food coloring. Which is always awesome.

So I blasted Josh Groban's Christmas CD, and got started.

first, you make the cookie dough, which was very simple.
Then you divide your dough into thirds. With food coloring, die one third red, one third green, and leave the last third white (plain). Let the dough chill out in the fridge for an hour.
Then the real fun begins! Divide each portion of dough into four equal pieces. Roll each piece into a 12-in. rope. Place a red, green, and white rope next to each other. Cut through all three ropes at 1-in. intervals, forming sets of three differently colored doughs. And repeat. Next roll each set into a ball. Place on a baking sheet, and flatten. Pop them in the oven, and bam! You've got perfect, minty, Christmas cookies!Each cookie is only 59 calories! So I had 2.
Get the recipe HERE.

These were so much fun to make. They definitely helped spread Christmas cheer throughout our home. I think kids would have a blast making these.

Want a healthy Christmas cookie tip?
Freeze your cookie batter, and only pull a few cookies out at a time to bake. This helps to limit your Christmas cookie intake :D
I'm excited for the 2nd day of Christmas!

What's your favorite Christmas CD?

Senin, 06 Desember 2010

12 Days of Christmas Cookies

I'm putting "Brittany's Kitchen Adventures" on hold this week (and next), to make room for
"12 Days of Christmas Cookies"!!

It's the season to be in the kitchen, baking up yummy, whimsical, Christmas cookies. Baking Christmas cookies always gets me
giddy with Christmas cheer
. This year I've been taken over by the Christmas spirit yet again, but I've been trying to live without my traditional Christmas baking. Why? Cause I'm on a diet! And because of this, I felt like I couldn't take part in one of my favorite holiday traditions.

Well, that's proving to be no fun. Just because I'm on a diet, doesn't mean I need to sit out, and deprive myself from the joy I get from baking, and all the yummy Christmas goodness. All it means is, I have to find Deliciously Healthy Christmas cookies to make, and exercise moderation.

This Holiday season, we can give ourselves the gift of being healthy and reaching our goals, while still enjoying our holiday baking! We can have our Christmas cookies, and still look good for Santa ;D

I present to you,
12 Days of Christmas Cookies.

Everyday, for 12 days, I'm going to make lower calorie Christmas cookies.

The fun starts tomorrow, 12/07, and goes to Sunday 12/19


Tonight I'm working like Santa's little elves on Christmas Eve.
I'm finding lots of healthy and adorable Christmas cookies. It's been hard to narrow it down to just 12, but I think I have them picked out!

I'm so excited!

Jumat, 03 Desember 2010

I can have one.

It's not the holidays, without
Queen Anne chocolate covered cherries.


It was practically a tradition at our house to eat a box (or two) of these every night, in the month of December.

This year, I can't eat an entire box of these, like years past.
But I can have one.

And I made sure to savour every bite of that one, delicious, chocolate covered cherry.

Here's how I eat my Queen Annes:

First, I bite off the top.
Then the cherry, and that delicious juice.
And last, but certainly not least, I eat the chocolaty shell.
And it makes me really happy.
You can still enjoy all your favorite seasonal treats.
Everything in moderation.

Happy holidays!

Senin, 29 November 2010

Brittany's Kitchen Adventures- Turkey Chili

Hope everyone had a great thanksgiving!

Welcome to Brittany's Kitchen Adventures!
Before going on a "diet", I had practically never stepped foot inside the kitchen. I've had to teach myself how to cook/bake, but there's still a lot of things I've never tried, because they intimidate me. I'm a Deliciously Healthy cook/baker in training. Come on a journey with me as I conquer the kitchen! Every Monday, I pick something new and challenging to try in the kitchen! I blog about each kitchen adventure, whether it was a success or not. There's bound to be some disasters, but hopefully a lot of Deliciously Healthy successes!

I have a confession to make.
I. Brittany@Deliciously Healthy. Am afraid of crockpots.

Yup. It's true.
I finally bought one about 6 months ago, but I've used one excuse after another to not use it. Crockpots intimidate me. Why? I'm not sure. I guess it's because I went my whole childhood without even seeing one with my own eyes. From what I remember, the first time I saw a crockpot was when I was 14, at my aunts house. "You leave it on all day? Huh?"
And I've been intimidated ever since.

Another little fact about me: I LOVE chili. Mmmm. So good. But, I've always been too intimidated to make it. It's so good, it has to be out of my cooking league.

So for this weeks kitchen adventure, I'm tackling 2, yes TWO things that scare the chubbiness right out of me.

I used this recipe, because it had the word "quick" in it. And that made me feel better.

First up, I cooked the ground turkey in a skillet. I thought I was going to cook the turkey IN the crockpot. Apparently slow cooking meat was one of the things that intimidated me, because I was relieved when I saw that I just had to cook the turkey the way I've done a thousand times before. That, I can do.On a side note- You want a cheap Christmas decorating tip? Slap present bows on everything!

Next I chopped up some onion, and bell pepper.

Then I just threw the tomato soup, canned beans, veggies and seasonings in the crockpot.
And started to stir everything together. At this point I started talking out loud to myself. I was telling myself how easy this was. That it was absolutely silly of me to be afraid of the crockpot, and of making chili, and I should believe in myself more. And just then, I realized I forgot a step. I forgot to spray the inside of the crockpot with cooking spray. Whoops.

I finished up stirring, put on the lid, turned it on high, and walked away, giving myself a pat on the back. 30 minutes later I came back to check on it. "Hmm. I thought it would be doing something by now?" Then I realized I forgot to plug it in. Silly me.

4 hours later, we dug in!Mmm. The fact that I made it, makes it the best chili I've ever had. Seriously delish.

It's the perfect dish to eat while sitting in front of the Christmas tree, and listening to Christmas music.
I feel myself getting more and more courageous in the kitchen. I'm realizing how silly it is of me to be intimidated by things like this. It's actually pretty empowering. Before you know it, I'm going to be making things I can't even pronounce! Like in french and stuff. I can't wait!

Is there a kitchen appliance that intimidates you?
Have you put up your Christmas tree yet?

Senin, 22 November 2010

Brittany's Kitchen Adventures- Pumpkin Pie

With Thanksgiving around the corner, I thought it was time for me to learn how to make pumpkin pie. I have visions of me pulling my homemade pumpkin pie out of the oven every year. I used this recipe for the pie crust, and the pumpkin pie filling.

Here's how it went:

First up, I needed to make the pie crust. This was definitely the most intimidating part for me. I figured making the filling would be a piece of cake. Or a piece if pie in the case. I've always heard people talk about what a hassle it is to make pie crust. So I just figured it was something I would never do. I was excited to face my fears, and try it as a part of my kitchen adventures!

First, I mixed the dry ingredientsEasy enough.

Then I slowly poured melted butter mixed with canola oil, into the dry ingredients, while mixing it with a fork. Then it said to mix in 3-4 tablespoons of ice water, until the dough was moist, and held together. Well, after 4 tablespoons, the dough was still pretty dry. This is what it looked like after the recommended amount of liquid:It could kinda hold together, but it would crumble easily: So, I added another 2 TBS of ice water.

Here's what the directions said after that: "Overlap 2 sheets of plastic wrap on a work surface, place the dough in the center and cover with 2 more overlapping sheets of plastic wrap. Roll the dough into a 12-inch circle. Remove the top sheets and invert the dough into a 9-inch pie pan." That part just seemed a confusing, and a little pointless. Although now it totally makes sense to me. I skipped the plastic wrap business, and just formed the dough into a ball, and started working it from there. That proved to be hard. The dough wasn't very easy to work with (mind you I have RA). So I thought I'd give myself a little help, and roll it out. Which now I see that that's what the directions were trying to tell me to do in the first place. Silly me. I was hoping it would roll out to a perfect circle, and would fit perfectly inside. That didn't really happen. At this point, I almost wanted to give up. It just didn't look like it was going to work.
But, I didn't
.
And soon this became this. And I was pretty proud of myself.
Looking back on it, it wasn't that hard to do. Especially if I would have paid more attention to the directions.

Then I moved on to the filling. Making the filling was very simple. I just had to mix the pumpkin, evaporated milk, spices, and eggs in a bowl, and pour it into the crust. Although I wasn't sure if it was supposed be this runny?Into the oven it went.
When it came out of the oven, it was still a little liquidity. I wasn't sure if that was normal, or not? I figured it would continue setting while it cooled down for 2 hours. But that never happened. I'm pretty sure I under cooked it.
Aside from being a little runny, it wasn't the best pumpkin pie I've ever had. I did like the whole wheat crust, but the filling wasn't all that great to me. I don't know if it was me, or the recipe? My husband liked it, but you know how that whole thing goes. I don't know if he really liked it, or if he was just trying to prevent me from crying over my first pumpkin pie.

I will definitely be trying it again though.
Practice makes perfect!

Have you ever made pumpkin pie?
Any tips?